

Hi everyone, today, I'll show you how to deploy a simple React-Django application to AWS EKS using Eksctl and Kubectl. Sorry, I had to take it off LinkedIn to accommodate all we need to write.
Side note: Eksctl is a command-line tool that simplifies the process of creating, managing, and operating Kubernetes clusters on the AWS cloud. It provides a simple and intuitive CLI, supports multiple regions, can automatically create and manage node groups, and integrates with other AWS services to make it easy to deploy and manage your K8s apps on AWS.
Prerequisites: For this project, ensure that you have the following tools installed on your local machine:
AWS CLI
EKSctl
Kubectl
Docker
Installing the AWS CLI version 2 on Linux
Download the installation file using the following command:
curl "https://awscli.amazonaws.com/awscli-exe-linux-x86_64.zip" -o "awscliv2.zip"Unzip the downloaded file:
unzip awscliv2.zipRun the installation script:
sudo ./aws/installVerify that the installation was successful by running:
aws --version
Installing the AWS CLI version 2 on macOS
Download the macOS installation file using the following command:
curl "https://awscli.amazonaws.com/AWSCLIV2.pkg" -o "AWSCLIV2.pkg"Double-click the downloaded file to start the installation process.
Follow the instructions in the installation wizard.
Verify that the installation was successful by running:
aws --version
Note: You will need administrative permissions to install the AWS CLI on macOS.
Installing eksctl on Linux, macOS or Windows
Download the latest release of
eksctlusing the following command:curl --silent --location "https://github.com/weaveworks/eksctl/releases/latest/download/eksctl_$(uname -s)_amd64.tar.gz" | tar xz -C /tmpMove the
eksctlbinary to a directory that is included in your system's$PATHenvironment variable:sudo mv /tmp/eksctl /usr/local/binVerify that the installation was successful by running:
eksctl version
Note: You may need to modify the curl command based on your system's architecture. Please refer to the eksctl releases page for the appropriate command.
Also, note that you need to have curl and tar installed on your system in order to execute the above commands.
Installing Kubectl on Linux
Download the latest release with the following command:
curl -LO "https://dl.k8s.io/release/$(curl -L -s https://dl.k8s.io/release/stable.txt)/bin/linux/amd64/kubectl"Make the
kubectlbinary executable:chmod +x kubectlMove the binary into your PATH:
sudo mv kubectl /usr/local/bin/Test to ensure the version you installed is up-to-date:
kubectl version --client
Installing Kubectl on macOS
Download the latest release with the following command:
curl -LO "https://dl.k8s.io/release/$(curl -L -s https://dl.k8s.io/release/stable.txt)/bin/darwin/amd64/kubectl"Make the
kubectlbinary executable:chmod +x kubectlMove the binary into your PATH:
sudo mv kubectl /usr/local/bin/Test to ensure the version you installed is up-to-date:
kubectl version --client
Note: You may need to modify the curl command based on your system's architecture. Please refer to the official Kubectl documentation for more information.
Also, you need to have an AWS account and IAM credentials that have sufficient permissions to create and manage EKS clusters (Admin role).
Build and push the Docker image:
I used an already built, tagged, and pushed Docker image for this example. However, for those who don't know how to, I'll provide the commands and link to my repository for the Dockerfile.
To build and push the frontend Docker image, run the following commands:
docker build -t registry-url/frontend:v1 .
docker push registry-url/frontend:v1
Do the same for the backend and we have two ready images to use. You can also use my own image - "ehmeeudosen/frontend:v2" and "ehmeeudosen/api:v1".
Create an EKS cluster Create an EKS cluster using EKSctl by running the following command:
eksctl create cluster --name app-cluster --region us-east-1 --nodegroup-name linux-nodes --node-type t3.micro --nodes 3
This command creates an EKS cluster with three t3.micro worker nodes in the "us-east-1" region. I must warn you, the complete provisioning takes quite some time, so be patient.
When completed, make sure you check your nodes by running:
kubectl get nodes
This command displays your provisioned nodes. I've attached a picture of mine below.

Deploy the Frontend and Backend apps to EKS using Kubectl and Expose the Frontend Service:
Create a Kubernetes deployment file in YAML format that specifies the Docker image, container ports, and any other desired configuration options. I've attached an example in the picture below.
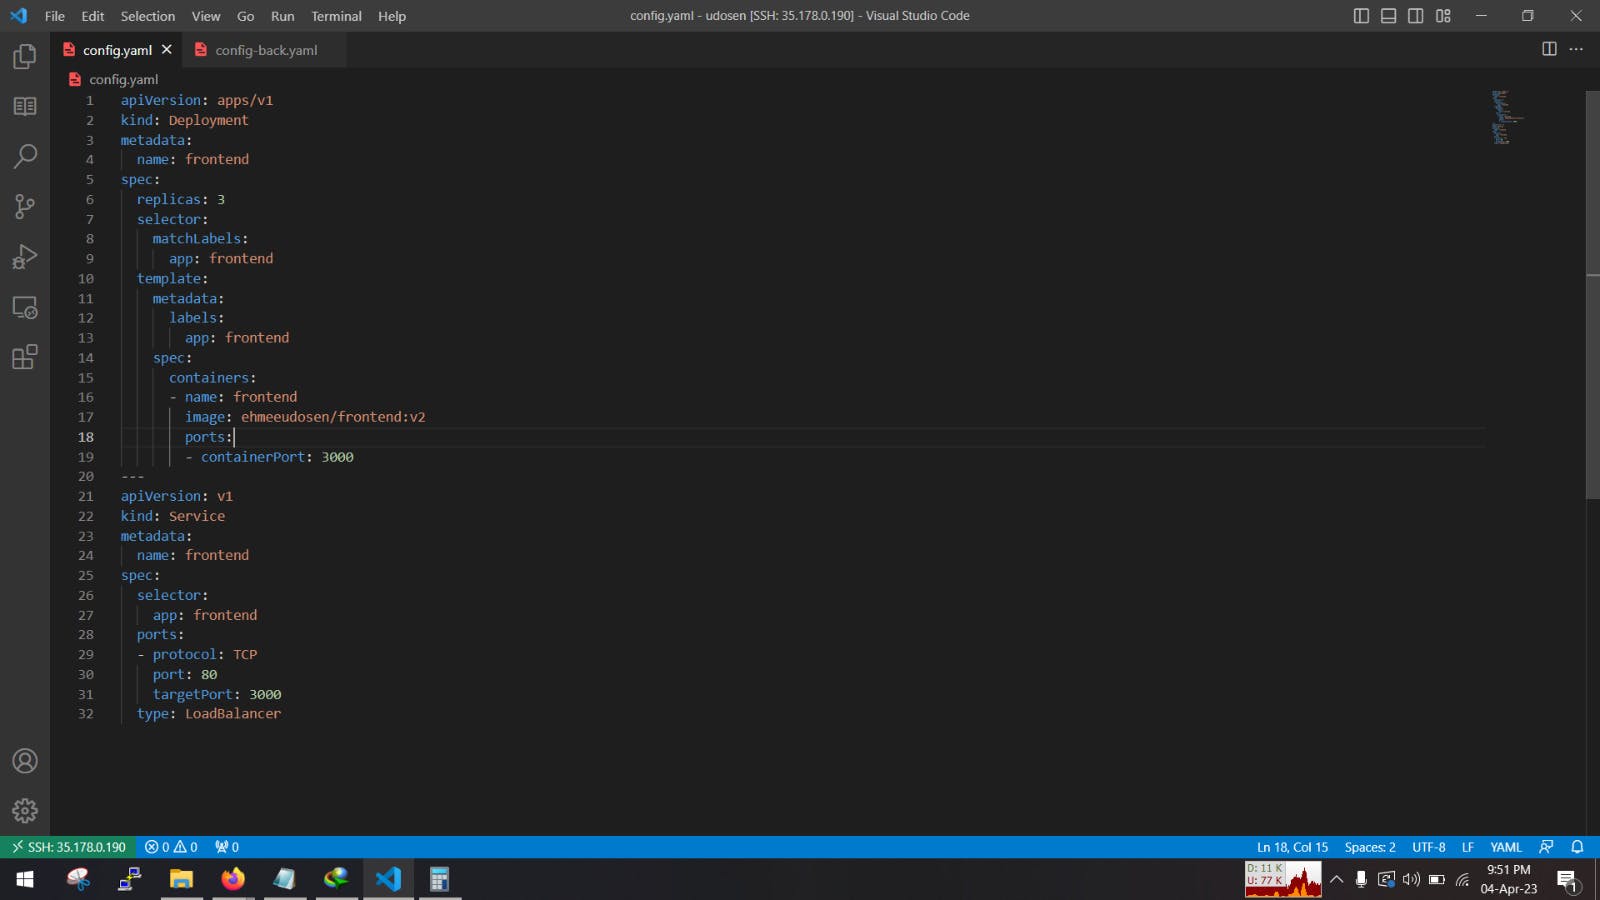
For the Frontend, I have two blocks, one for deployment with three replicas of the app's container, with a public port of "3000," and the other for external service of type "LoadBalancer" that maps the public port 80 to the app's container port 3000. Then run the following command:
kubectl apply -f config.yaml
In my case, config.yaml, do the same for the backend using the backend-deployment.yaml file.
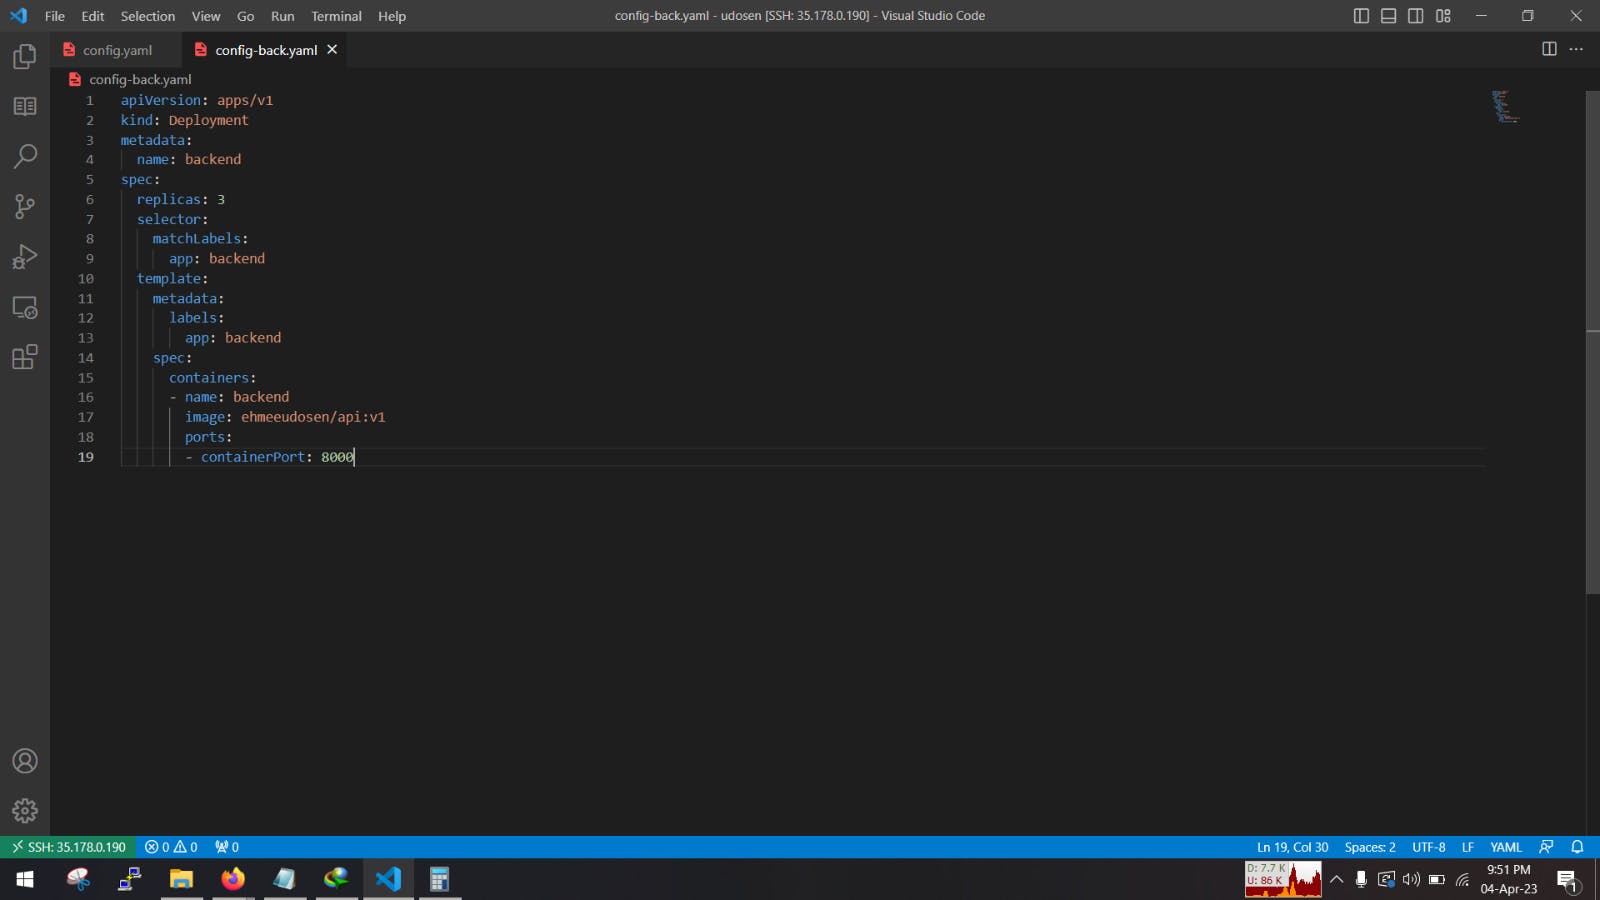
kubectl apply -f config-back.yaml
Note: The service block can be created on a different file; it's all your choice to make. The aim is to expose the frontend service to the internet by creating a service that maps the frontend deployment to a load balancer.
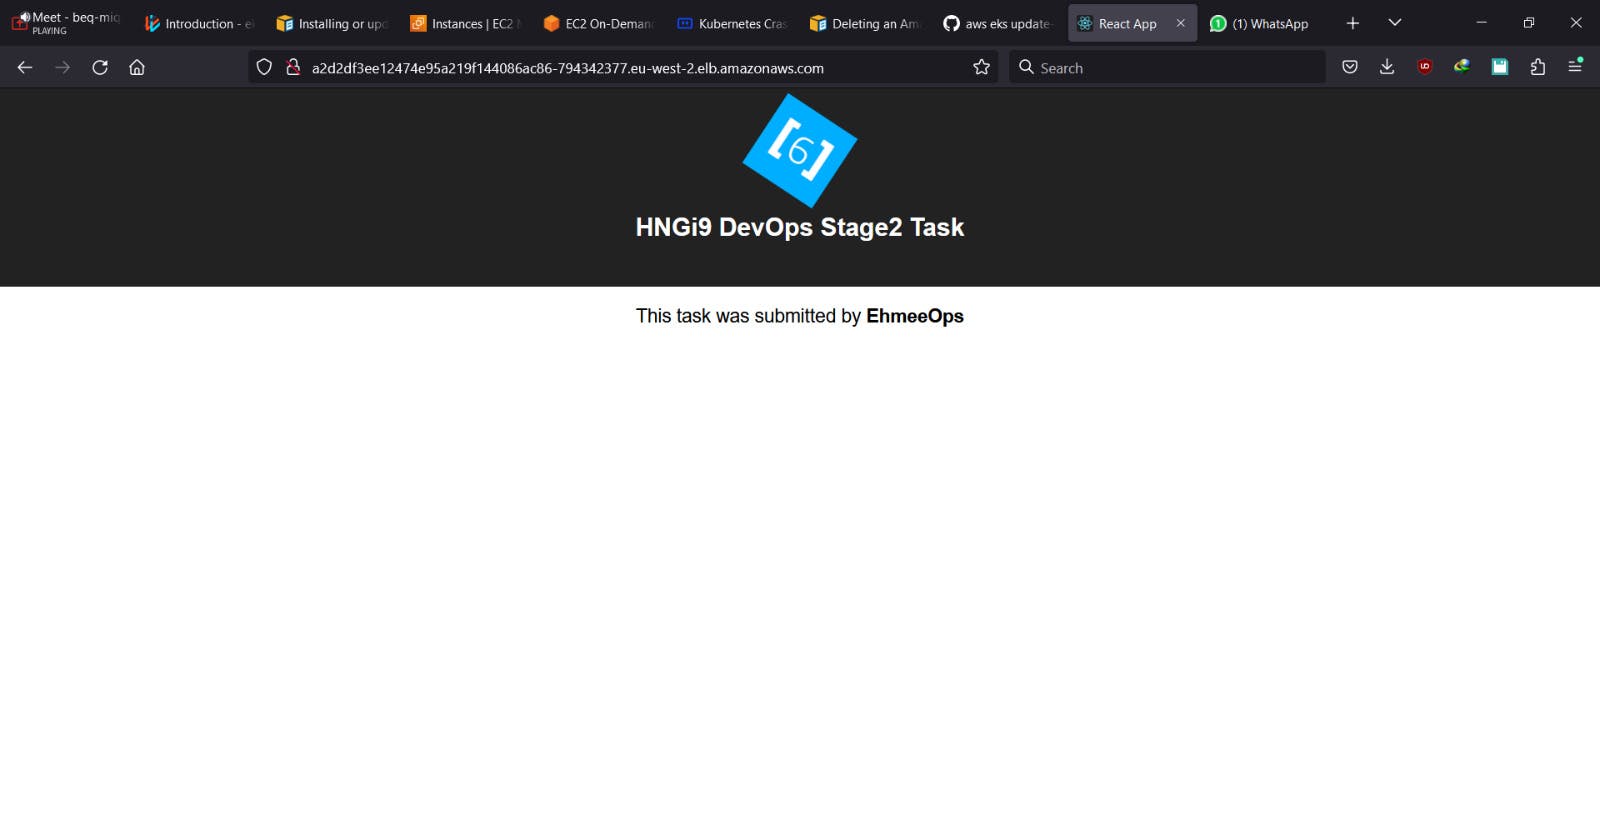
Access the Frontend app:
We'll get the external IP address of the load balancer that was created by the frontend service by running the following command:
kubectl get services my-frontend-service
This command displays the IP address of the load balancer.

Open a web browser and navigate to the IP address to access the app.
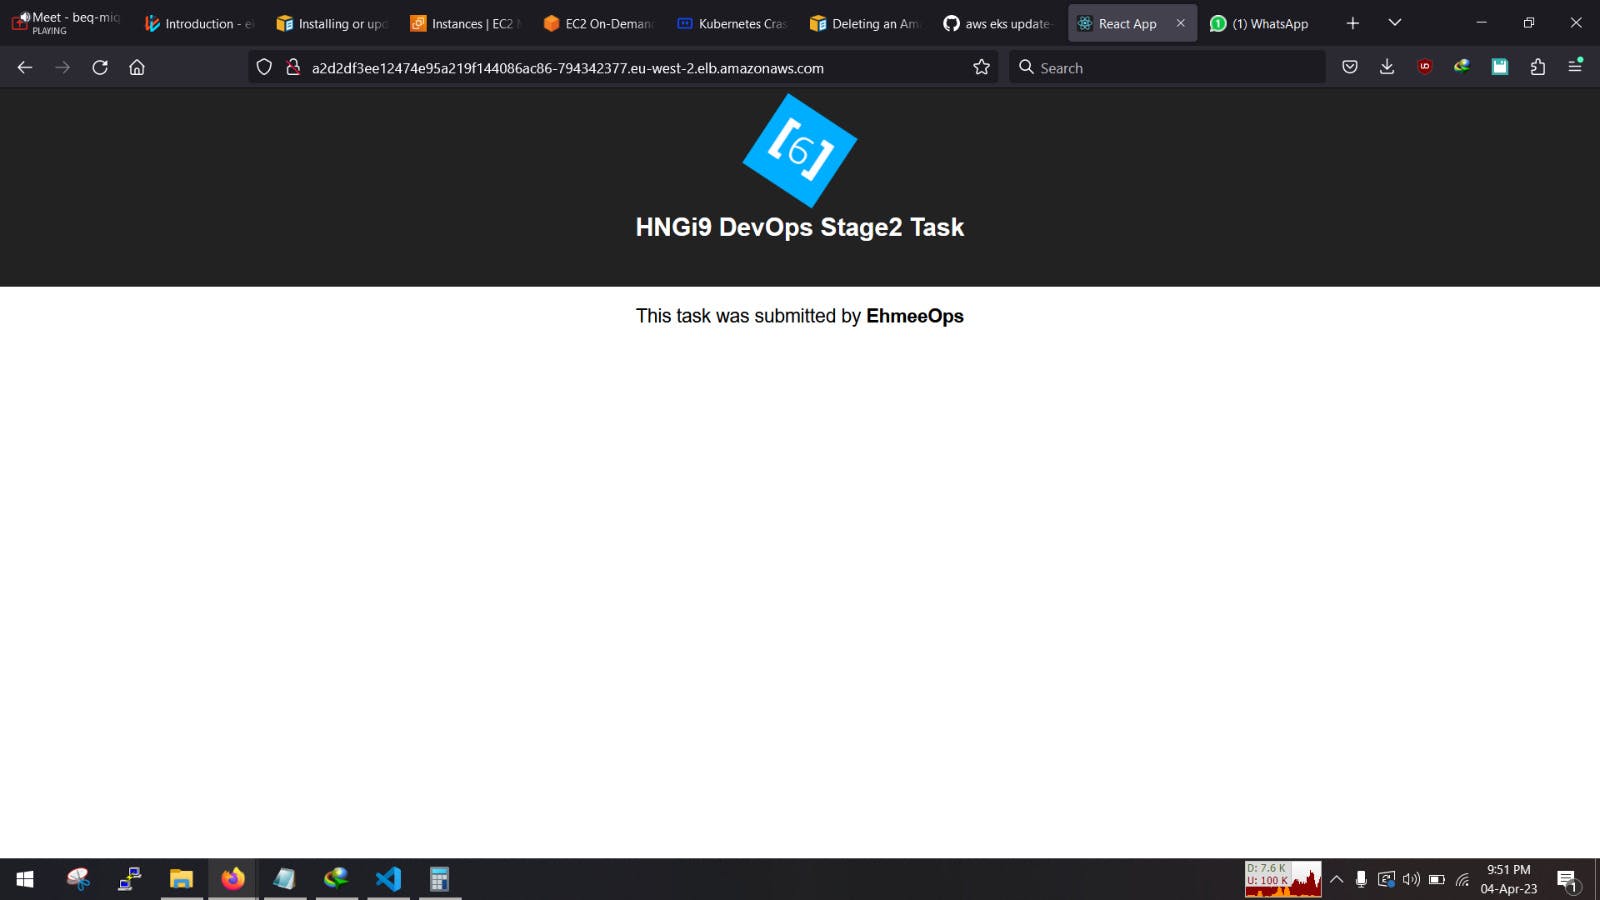
Congratulations! You have successfully deployed a frontend React and backend Python app to AWS EKS using EKSctl and Kubectl.
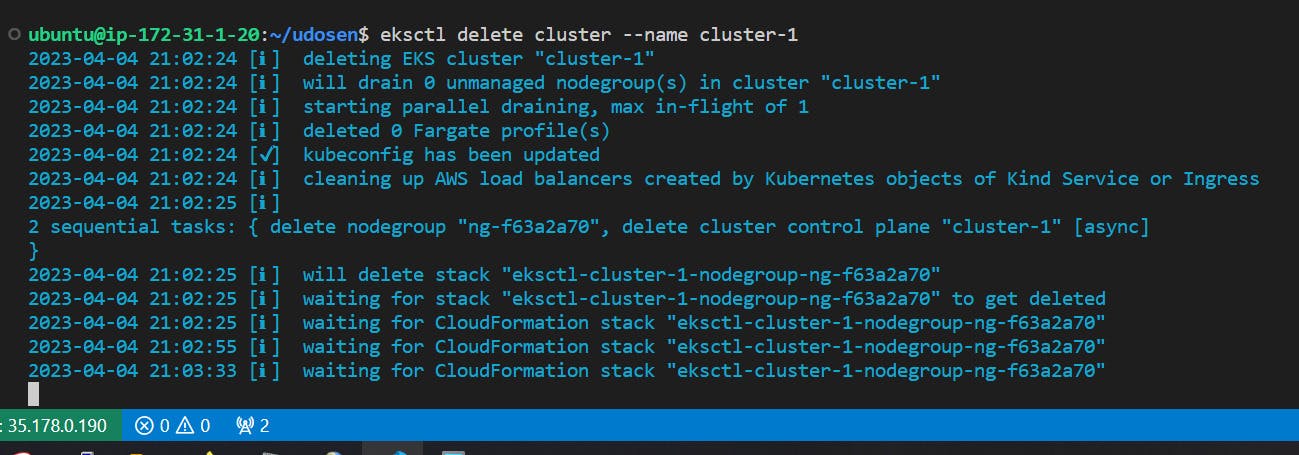
P.S: Don't forget to destroy your cluster after you're done with the task to avoid unecessary bills.
I forgot a few screenshots here and there so please bare with me.